Preparing Images for Digital Presentation Using Photoshop
The color space of your document is much like a language such as Italian or Spanish. If you use an electronic translator for Spanish to English and type in an Italian word you’re not likely to get the correct result. Although there are many similarities between the two languages they are definitely not the same. Most color spaces are similar that way but are definitely not the same. Photoshop is a very powerful program and it has a translator that automatically recognizes virtually all color spaces (languages). When you open an image in Photoshop it automatically recognizes the embedded color space of the image and displays it correctly on your monitor – assuming you have your RGB color settings set “preserve embedded profiles”. Unfortunately other programs such as most web browsers and the program that NCCC uses to project images do not have this translator. These programs only recognize the SRGB color space (language).
It doesn’t really matter what color space you use when editing your images. Many of use like to shoot and use Adobe RGB or Pro Photo RGB for editing because it has a wider range of color and will preserve more information during the editing process. If you shoot in RAW you may even edit in 16 bit color mode. The trick is to convert the document to 8 bit mode and the SRGB profile before sending it off for digital presentation. So here’s my procedure for preparing the image. If you found the above somewhat confusing, don’t worry about it, just follow the instructions below and you’ll do fine.
1- If you have any layers in the image you’ll need to go to the menu bar and choose ‘Layer > flatten image’.
2- Make sure the image is in 8 bit mode by going to the menu bar again and choose ‘image > mode > 8bit’.
3- From the menu bar one more time choose ‘Edit > convert to profile’ and for destination space choose ‘sRGB IEC61966-2.1″. If both the Source Space and Destination Space already show sRGB IEC61966 then you can hit “cancel”.
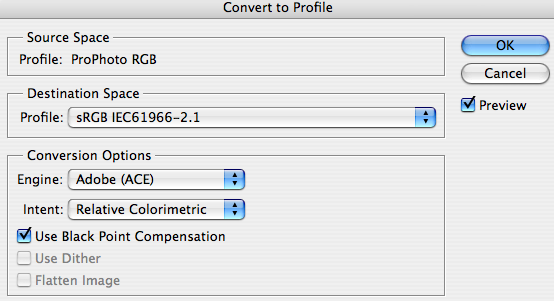
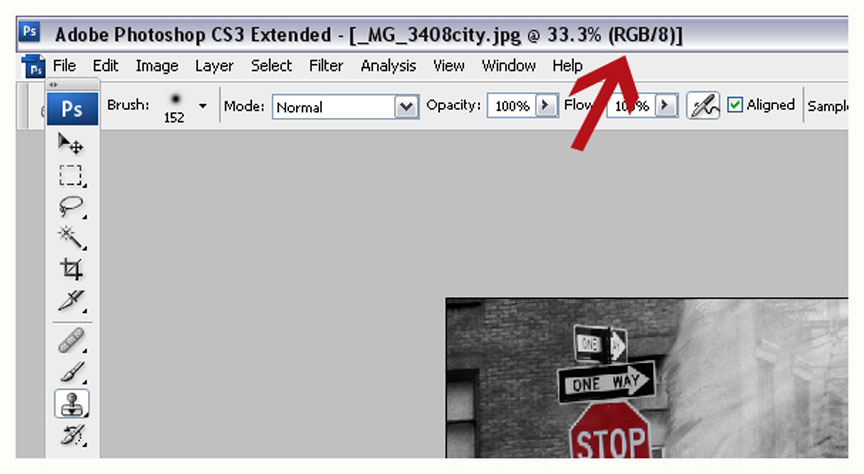
Step 3 above will make sure that Photoshop properly converts your image to the sRGB space with little to no change in color. To check that you’ve done this correctly, your image title should show ‘RGB/8’ as shown in the screen shot below.
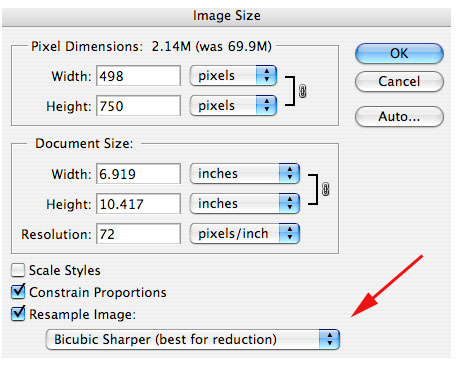
4- You’re almost done. Finally you want to resize your image. Go to ‘Image > Image size’ and first set the resolution to 72. Next type ‘750’ in either the width or height, whichever was originally larger. Also in the pull down box indicated by the red arrow you should use ‘Bicubic Sharper’ (or ‘Automatic’ if available) when doing this step. After doing this step you may sharpen or perform any other final adjustments you deem appropriate.
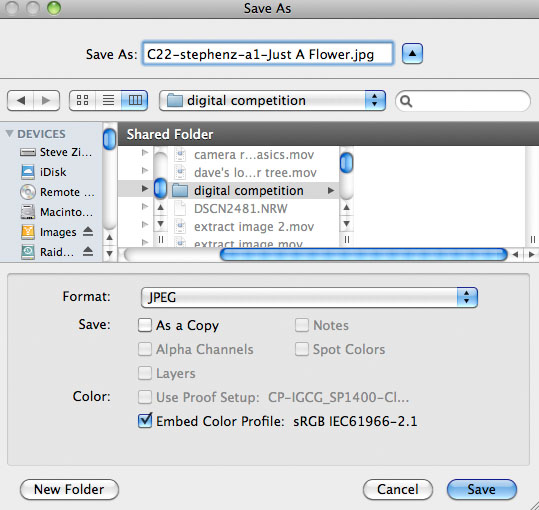
The only thing left to do is save your image. Go to ‘File > save as’ at which point you should see a window similar to the one shown below. Be sure to name the image with the proper format (i.e. C22-your assigned name-a1-image title.jpg) and that ‘JPEG’ is selected for the file type. Your user name is limited to 9 characters and the image title is limited to 36 characters without any punctuation. Since the image is very small at only 750 pixels you should save the image at the maximum quality as shown in the next screen shot.
Once saved, you may close the original image in Photoshop WITHOUT SAVING to preserve the original. Do not reopen the saved image in Photoshop or do any editing in Lightroom as this can create problems with the file. Simply email the image(s) as attachments to the digital chairperson with no text in the body of the email. In the subject line of the email you can indicate which competition month the image(s) are for.
OPTIONAL – You can download a Photoshop action (even for Photoshop Elements) to do everything automatically with the exception of saving the file. Click here for the action which will work on PC’s and Mac’s. Once downloaded, double click the action to load it into Photoshop. If that doesn’t work, you’ll have to open the actions palette and click “load actions” from the actions menu (three horizontal lines in the upper right corner) which will allow you to navigate to your download folder. The name of the action is “NCCC-4.atn”. Open your image and either play the action from the actions palette or use the keyboard shortcut shift +command(PC control) + F5. All those steps above have now been performed automatically for you. The only thing left to do is save the file with the correct title as outlined above.